
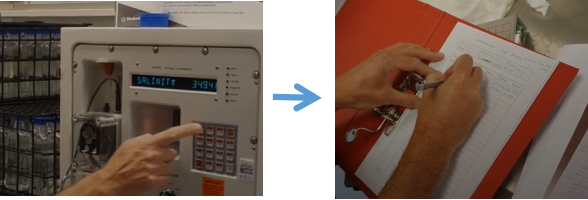
Laboratory salinometer sampling#
(Refer to the overview of the Portasal salinometer for an overview of what the different terms refer to).
Preparing to process new sampling batch#
One sample create — 24 bottles — corresponds to one log sheet.
Process one crate at a time, not bottle by bottle.
Processing one crate takes about 45 minutes for someone used to the process.
This does not include seting up, becoming aquainted with the process etc..
Make sure to have a log sheet ready before analysis.
Make sure to have sample bottles and standard water bottles ready and equillibrated to room temperature.
Check the room temperature (note on log sheet).
Check the bath temperature (note on log sheet)
No need to use gloves - but do try to keep things clean.
Shake the bottles - ideally 10 minutes before beginning.
Note
When the salinometer operates correctly, you should see occasional flashing of lights within the cell. This means that the heating element is working correctly. If you never see any lights, or if the lights are constantly on or blink incessantly, there may be something wrong with the heating element, or the bath temperature may be too far away from the desired value.
Seawater standard#
At the start and end of each crate, we sample a sample of standard water (reference water sample with known salinity). This makes it possible to correct the laboratory measurements for small biases and to diagnose sensor drift.
Have two standard water bottles ready when beginning to process a sample crate.
Sampling procedure - procedure for each new sample bottle#
Tip
In general, the measurements themselves are quick - it is the flushing that takes time.
Gently wipe any water off the sampling tube with a kimwipe. Briefly turn on the pump to suck any remaining water out of the tube (📹 Clean the sample tube).
Find the bottle you want and prepare the sample.
Write down the bottle sample number in the log sheet.
Take the lid off the bottle. Pry the white plastic lid off (you may want to use a knife or your fingernails - just make sure not to contaminate the sample.)
Wipe any water droplets off the rim of the bottle. If there are salt crystals along the edge, make sure to wipe them away (don’t push them into the bottle).
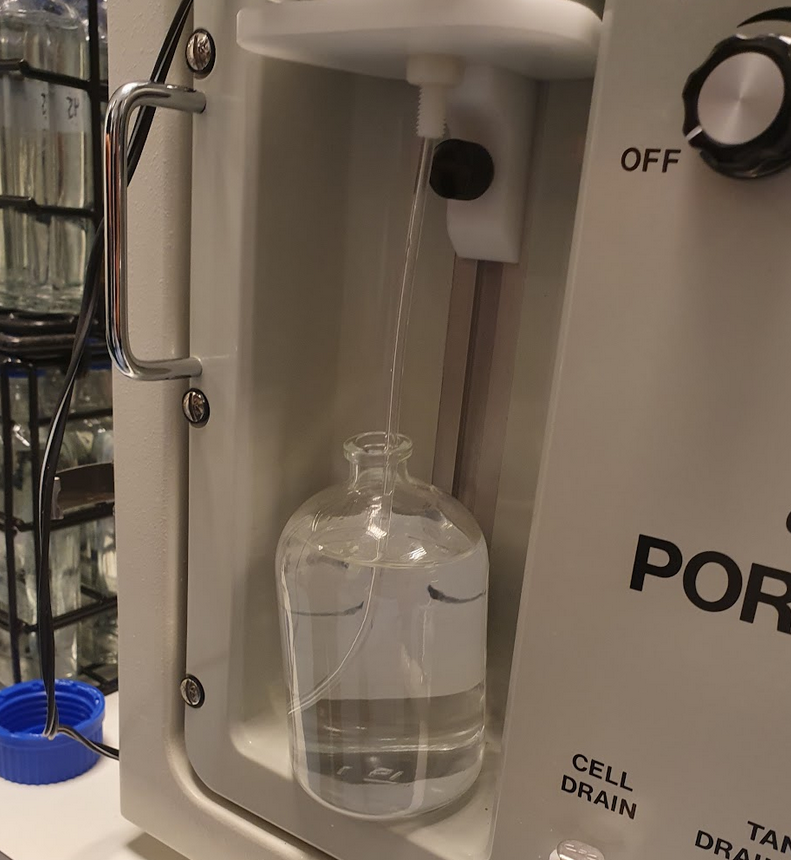
Put the bottle in the sampling slot below the pump, with the sampling tube inside the bottle.

Turn on the pump (always to
2), turn on the air pump (by turningFLOW RATEto the right; there is only one level) and straight away flush the cell. This clears the old sample and sucks in water from the new one.Repeat the process - flush the cell three times (while the pump and air pump are is running).
Think about how many times it fills, not how many times you press the button.
When the cell has been filled with water from your sample bottle three times, you are ready to take a measurement.
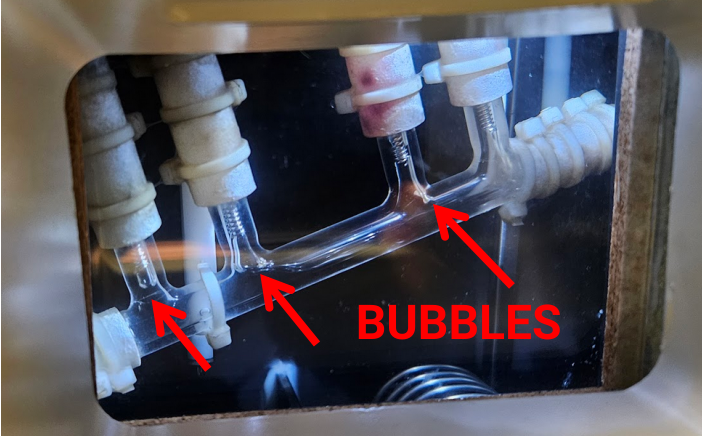
On the third filling, watch the cell carefully - there should be no bubbles in the cell. If there are bubbles, you may have to flush and refill again.

Take a measurement
Turn the
FUNCTIONknob toREADand selectSALin the button panel in order to display the salinity reading.Keep the air and water pumps on while taking the measurements.
If the salinity reading in the panel is stable (can take a few seconds), write down the value in the sample log sheet.
Turn the
FUNCTIONknob toSTDBYand flush the cell.Repeat until you have three salinity readings (and the three first columns of the bottle’s row in the log sheet are filled out).
If the three values agree: Proceed to the next bottle. (Unless it is a standard sample - then take 5 readings in any event).
If the three values do not agree: Perform two additional readings so that you get a total of five readings.
Keep an eye on whether you have large deviations or e.g. systematic drifts. Reoccurring issues can be indicative of a problem (see Troubleshooting).
It is normal to see variations in the last decimal.

Tip
As you become used to the process, you may find it saves time to:
Read the salinity value from the display
Flush the cell
Write the value down in the log sheet while the cell refills
Proceeding to the next sample
You can immediately proceed to the next sample bottle (begin with flushing thrice).
If this is your last sample, it is important to flush with MQ/distilled water.
Finishing up#
Make sure to scan or photography the log sheet with the measurements as well as preserving the physical copy.
These values will have to be digitized and can then be used to compare laboratory and CTD salinity values.
Flushing the cell#
To flush, put a finger over the hole (below where it says FLUSH). This will cause air to flow into the cell, flushing the water out.
The water exits through the tube attached to the CELL DRAIN tube outlet - hopefully into a bucket you have placed at the end of the tube.
This is assuming that you have already turned on the water pump (set to 2) and th air pump (toggle FLOW RATE button to the right).