Preparations for laboratory sampling#
Equipment#
In order to get started, you will need:
-
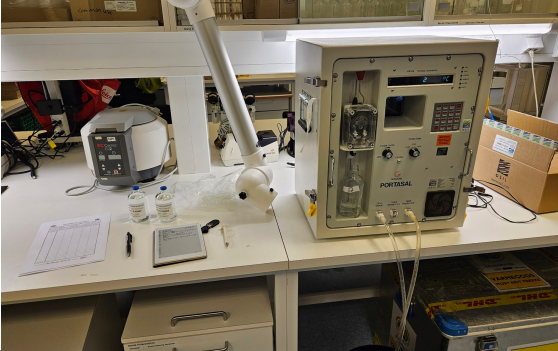
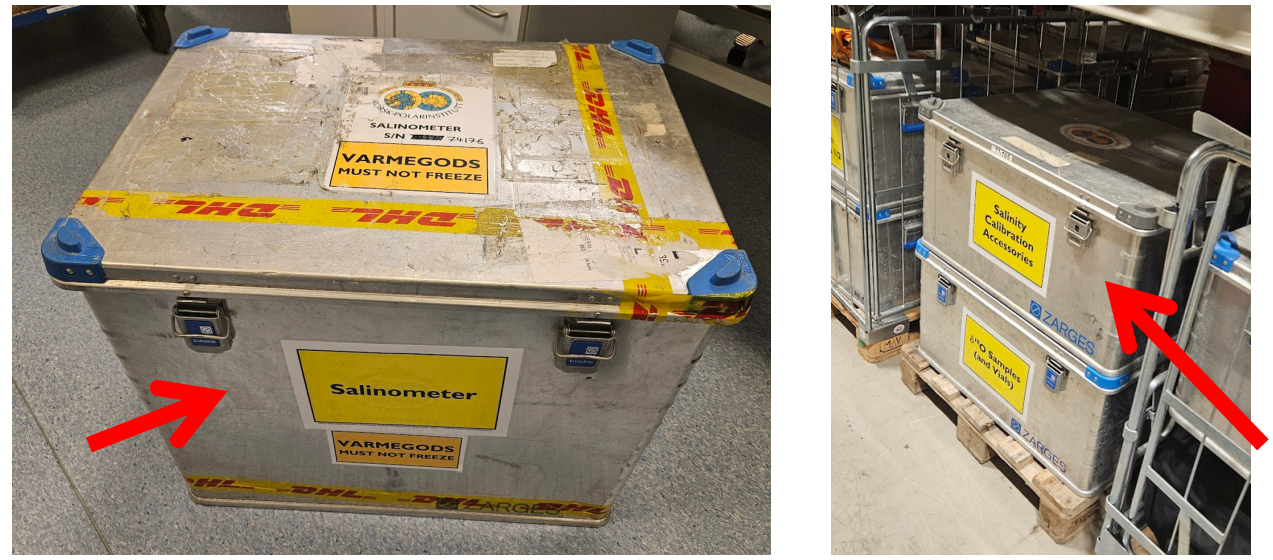
Instrument itself is kept in a large Zarges case labelled “Salinometer”.
Everything else (tubes, thermometer, bottles, power cords, repair kit, manufacturer manuals..) kept in a Zarges case labelled “Salinity Calibration Accessories”.
At the Fram centre, these boxes are typically kept on the northernost aisle of the basement storage warehouse (leftmost aisle when exiting the elevator).

A sampling room fulfilling the following three requirements:
Stable air temperature (a well working air conditioner could possibly do the job).
Easy access to Milli-Q/distilled water
A sink for waste water and rinsing of bottles.
At the Fram centre, we use the 6th floor IMR/NPI lab in Fram 2. Ask Anette Wold for details and access.
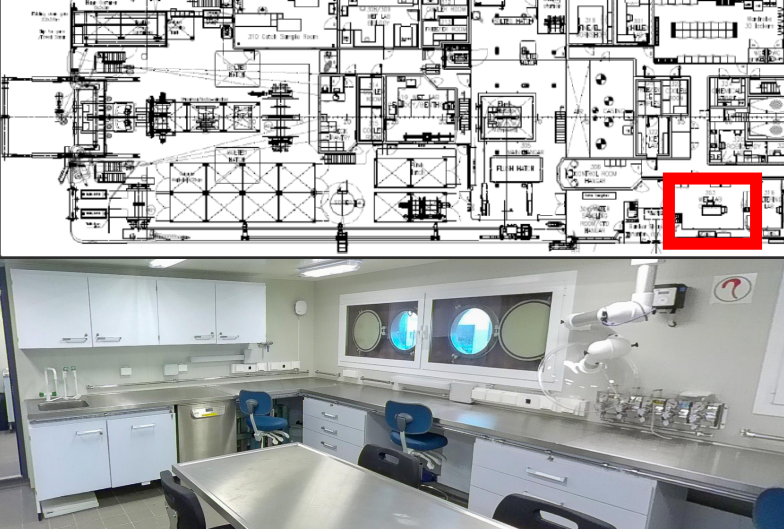
On the KPH, we have often used the starboard side wet lab (303):
Your samples
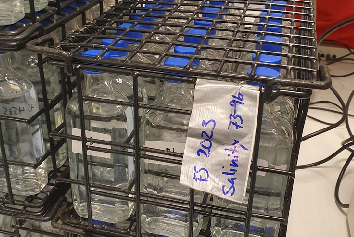
Glass bottles with sea water samples collected during the cruise. Typically in crates of 24 bottles.
Samples should equillibrate in the sample room 24 h before sampling.
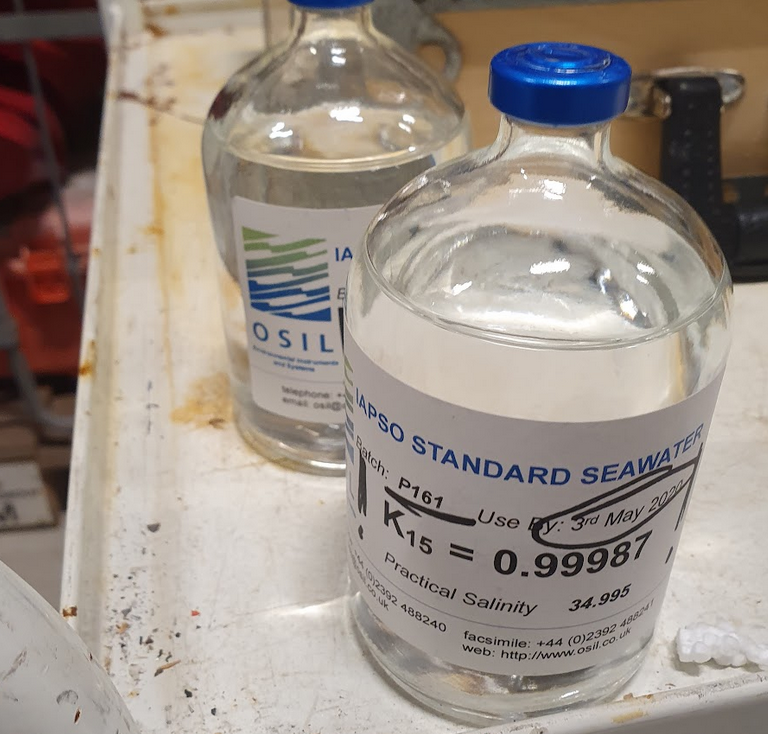
Standard sea water
Bottles with reference samples of known salinity.
Two samples per crate.
These are ordered from a manufacturer about once per year.
Other
Bucket for waste water.
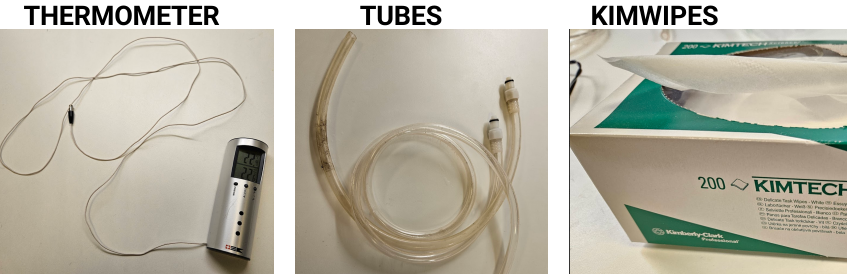
Plastic tubes (should be in the salinometer kit).
Air thermometer for room temperature (should be in the salinometer kit).
Kimwipes.
Sample log sheets.


The day before sample analysis#
Locate the equipment listed above.
Leave the samle and standard water bottles in salinometer room for 24 h prior to the analysis to allow for the temperature to stabilize.
Fill the salinometer water bath:
The salinometer does not need to be powered up at this stage.
Attach tubes to
TANK DRAIN FILL(inflow for MQ, long tube) andTANK OVERFLOW(for outflow when water bath is filled, short tube).Connect inflow tube with MQ/distilled water tap (avoid microorganisms from growing, do not use tap water).
Important to not use too much pressure here - do not fill the tank at maximum rate.
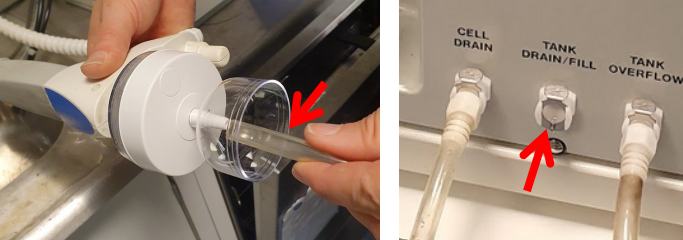
Check the water level both by releasing inflow tube and by checking the level through the monitor glass.
When done, keep the
TANK OVERFLOWvent open (i.e. keep tube on).Attach the other tube to
CELL DRAIN.
Power up the salinometer:
Open the metal lid on the back.
Connect the power cable.
Connect the power cable to the pump.
Switch on the machine (button on the back).
Set the bath temperature
Measure the room temperature and press
T seton the instrument to set the water bath temperature to 2 degrees above the room temperature.Adjust the value using the up and down arrows and press
ENTERwhen satisfied.
Rinse/flush the cell with MQ water
Prepare a bottle with MQ and insert the thin sample tube.
Check the tube of the peristaltic pump and massage it if necessary.
Power up the pump and set pump speed to 2.
This value should always be 2 when the pump is on, this will optimize the precision.
Flush the cell with at least 100 ml MQ.
To empty the cell, use the built-in air pump, i.e. turn on the
FLOW RATE(pretty noisy) and use a fingertip to block the air vent.

Note that the bath temperature can take several hours to reach the set temperature. Wait until the next day or at least 6 hours. To
check the bath temperature press TEMP, this value must be within 0.02ºC of the set bath temperature. The heater lamps should be
flashing when the bath temperature is set properly. If not, check the heater lamps (9).
If the bath temperature is satisfactory, it is possible to start analysing samples. This can be done either by jumping directly to section 8 or by starting with the reference (7.2) and zero (7.3) calibrations, the standardization (7.4), to finish with the samples. A standardization may be useful if the accuracy of the instrument is poor, but not necessary since measurements of standard seawater can be used to do a post-calibration.
If the instrument will be running over several days, the room and bath temperatures should be checked daily. It is ok for the bath temperature to be within 1 degree below to 3 degrees above the room temperature but aim for 2 degrees above.